How to Customize the Installation of harmon.ie Classic
You can customize the harmon.ie Classic installation file (.msi) by defining registry keys that will be set during the harmon.ie installation process and will pre-configure:
- Initial SharePoint sites. When users open harmon.ie for the first time, they can start working with these SharePoint sites without configuration.
- Favorite locations.
- harmon.ie Options.
- If your organization requires it, you may rebrand harmon.ie with your company’s name and logo.
To How to Customize the Installation of harmon.ie Classic:
There are several tools in the market that allow you to modify the installation file, we recommend using the free version of Master Packager, as explained below.
- Download and install Master Packager.
- Prepare a registry file (.reg) that includes the keys you want to set to all users. Read Centrally Configure harmon.ie Classic for All Users via Registry to learn about the available harmon.ie keys.
If you wish to rebrand harmon.ie with your company’s icons and labels, follow the instructions in How to Modify Labels and Images in harmon.ie Classic, and include the branding keys in your reg file. - Launch Master Packager.
- Click Open MSI/MST/MSP.
- Select the harmon.ie msi file you want to customize:
- HarmonieSharePointSetup.x64.Ent.licensed[.Teams].msi (for 64-bit Office)
- HarmonieSharePointSetup.x86.Ent.licensed[.Teams].msi (for 32-bit Office)
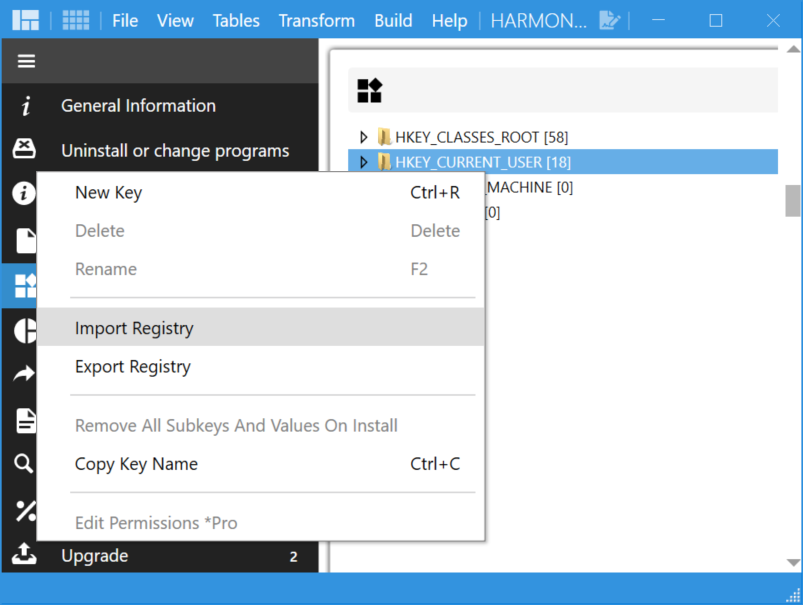
- Click Registries.
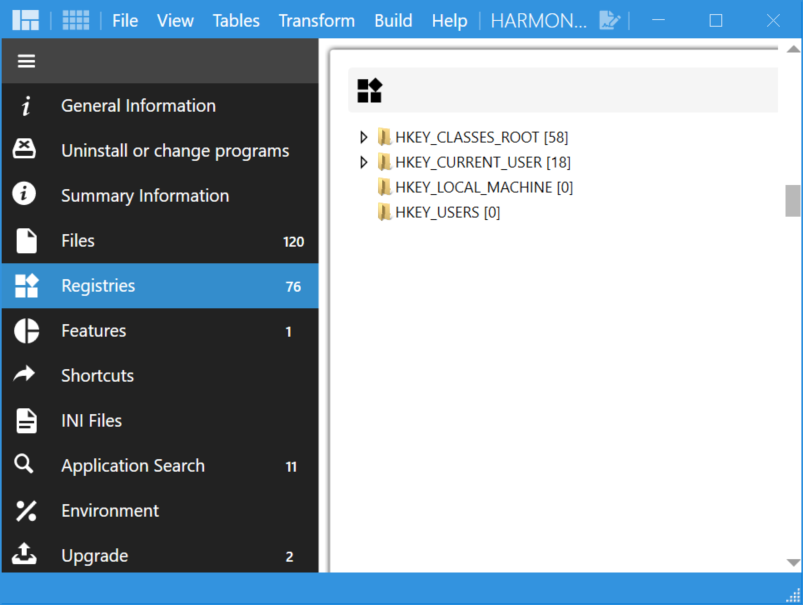
- Right-click HKEY-CURRENT-USER or HKEY-LOCAL-MACHINE > Import Registry.
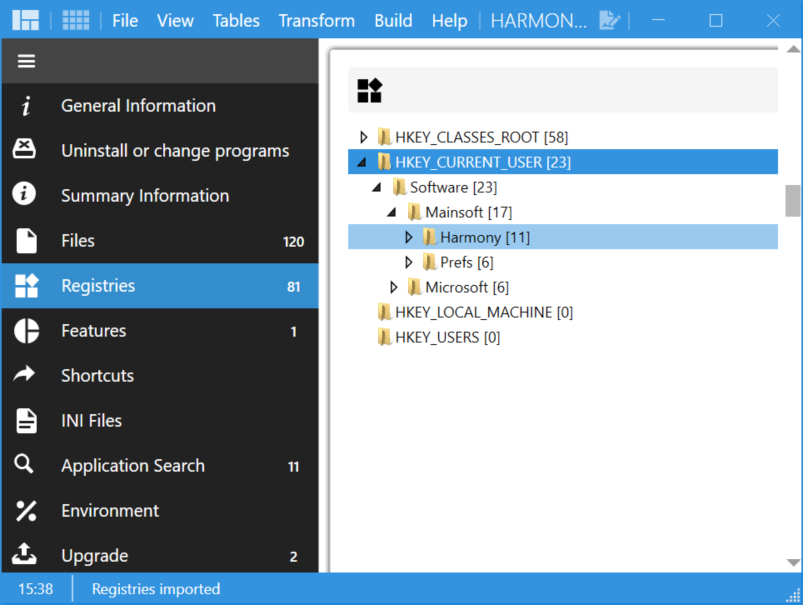
- Select the registry file you prepared and click Open.
- Click File > Save. This will add the Mainsoft reg key with your options to any user installing this customized MSI.
- Distribute the updated MSI file to your users.
To review the full list of harmon.ie registry keys, read Centrally Configure harmon.ie Classic for All Users via Registry.
The rebrand harmon.ie with your logos:
This is an optional step.
- Create your own images for the harmon.ie sidebar.
- Create a registry file with the branding registry keys set to your own images and labels.
- Launch Master Packager.
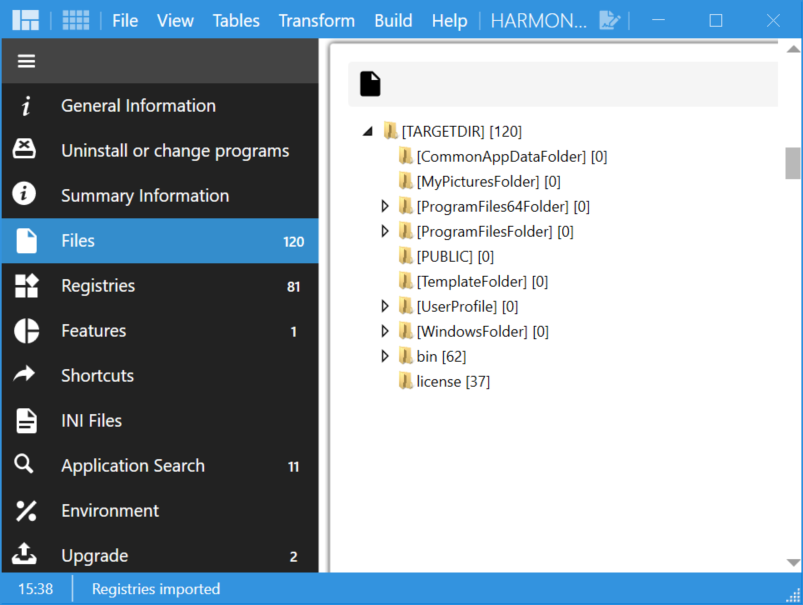
- Click Files
.
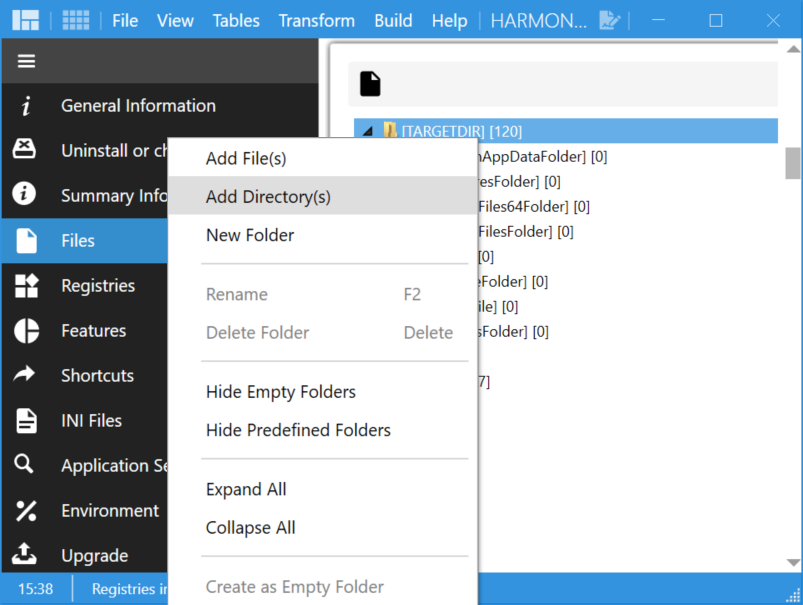
- Right-click TARGETDIR > Add Directory(s).
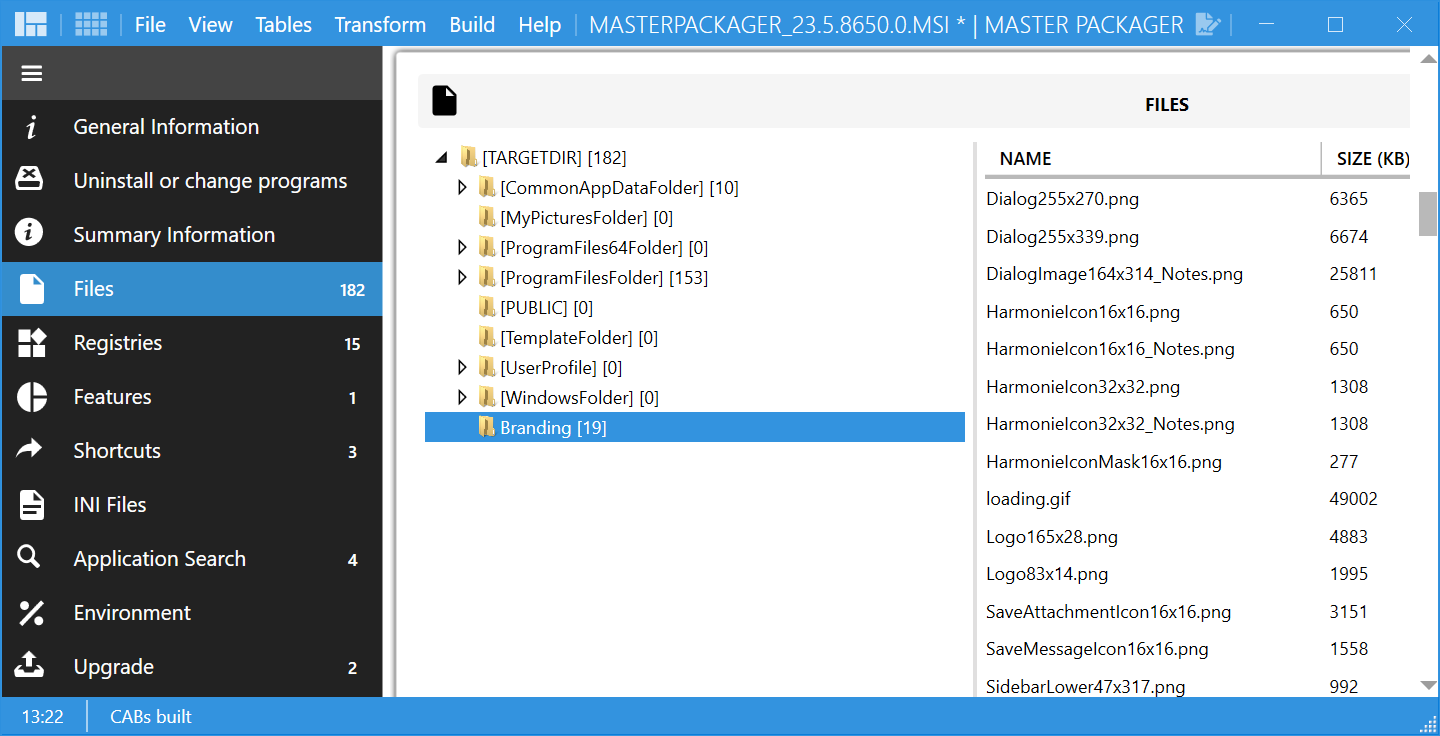
- Select the Branding folder (which is the output of the image generator tool) where you have your images > Select Folder.
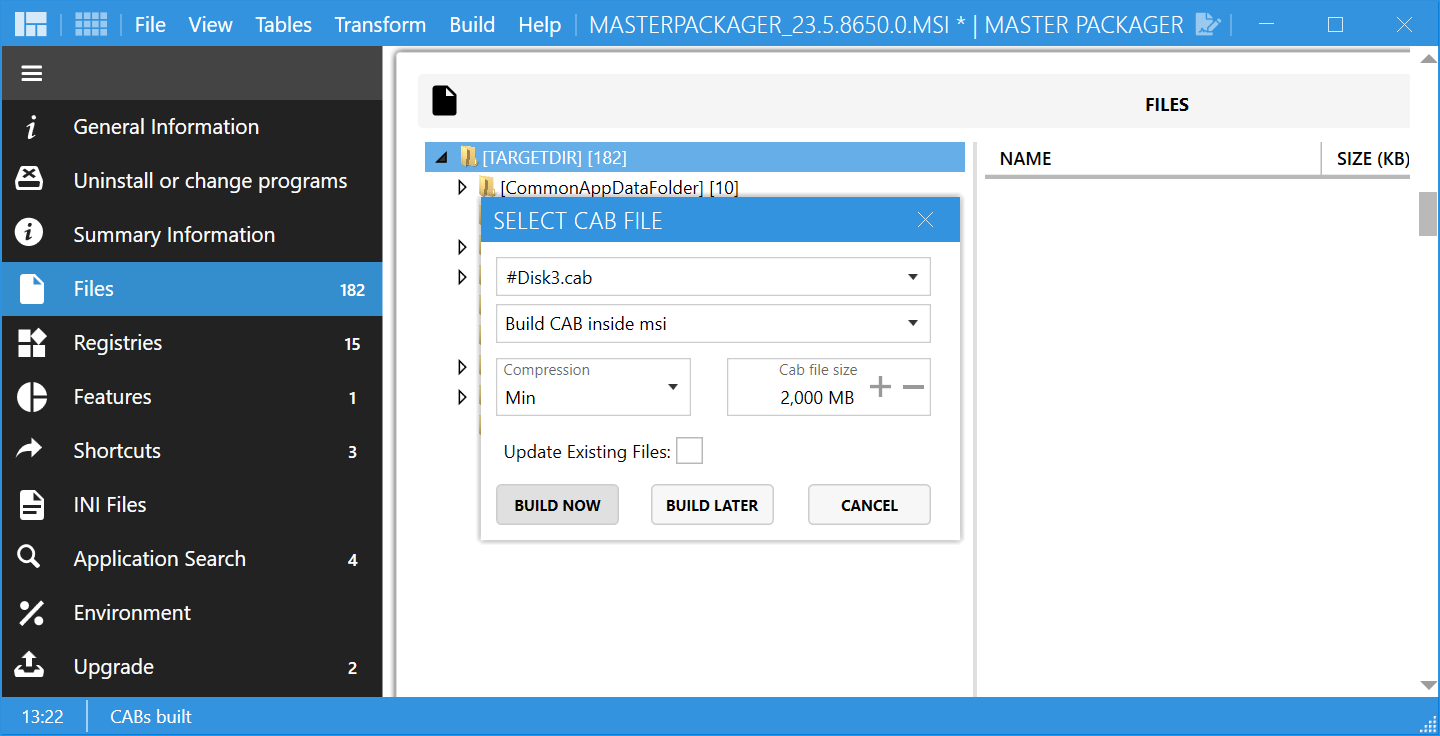
- Click Build Now.
This adds the Branding folder under the harmon.ie installation location, with all branded images.
 .
.