
We recently covered why file management in Microsoft Teams can be so confusing and confounding. But that doesn’t mean there’s no hope for taming things a bit, and Microsoft 365 includes some useful tools for this purpose.
Realizing that Microsoft Teams has usurped SharePoint for some collaboration and file management tasks, Microsoft has been augmenting and exposing metadata for files shared using Teams. This gives users many more options for how they categorize and keep track of these files. And since any of these features have been added relatively recently, even experienced Microsoft Teams users may be unfamiliar with their full capabilities.
Exposing more metadata
By default, Microsoft Teams puts any file posted to a channel in the Documents > General folder. To access these files, go to the channel within Teams and click the Files tab. With even moderate collaboration activity within a channel, this General folder can rapidly become an unorganized mess of files.
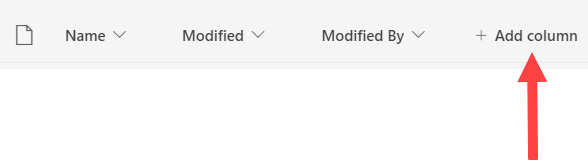
The default view only exposes the file name, modified date, and last person who made a modification. This isn’t particularly helpful when trying to find one or more files based on anything other than the file name, especially since some of these files may be emails that use the message’s subject line to dictate the file name.
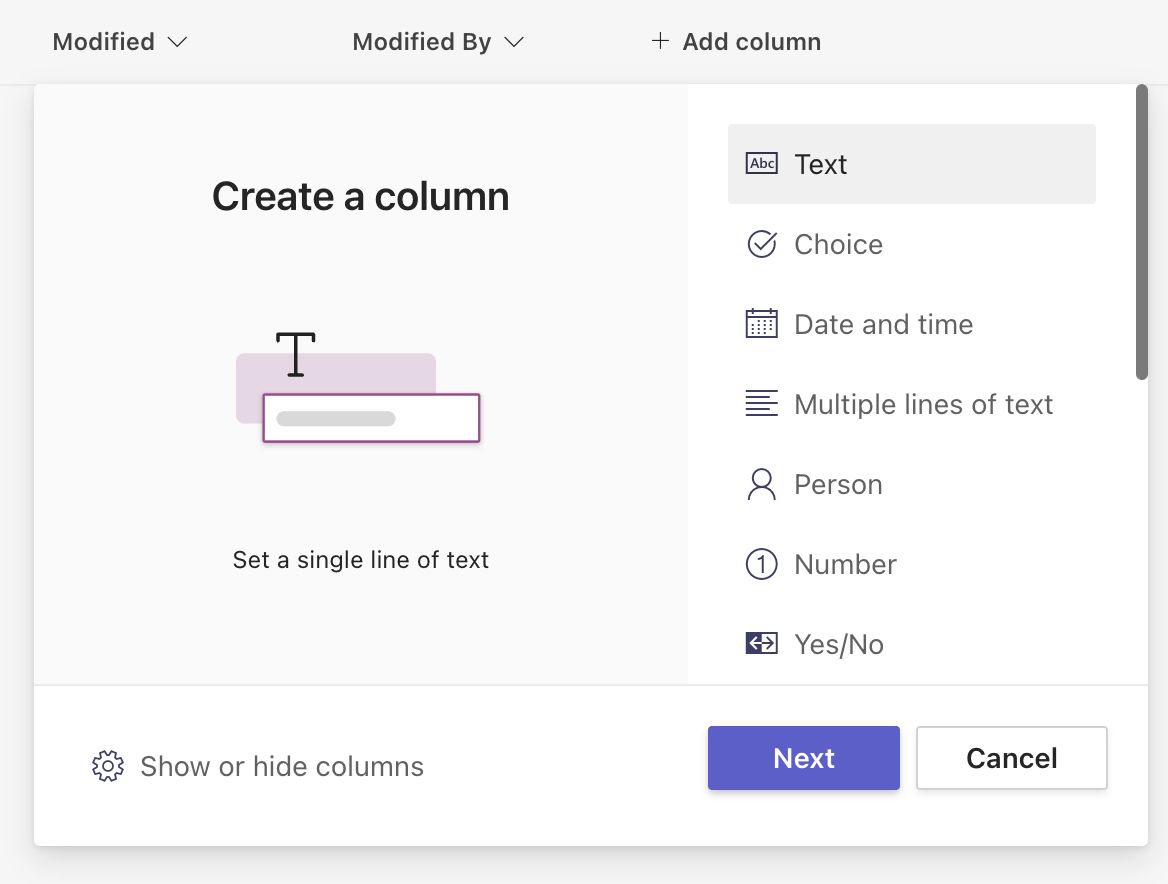
Thankfully, the default view can be expanded to include additional new or existing columns. Clicking on Add column to the right of the Modified by column brings up a window of available options for the new column.
Users can then select one of those options to add a new column.
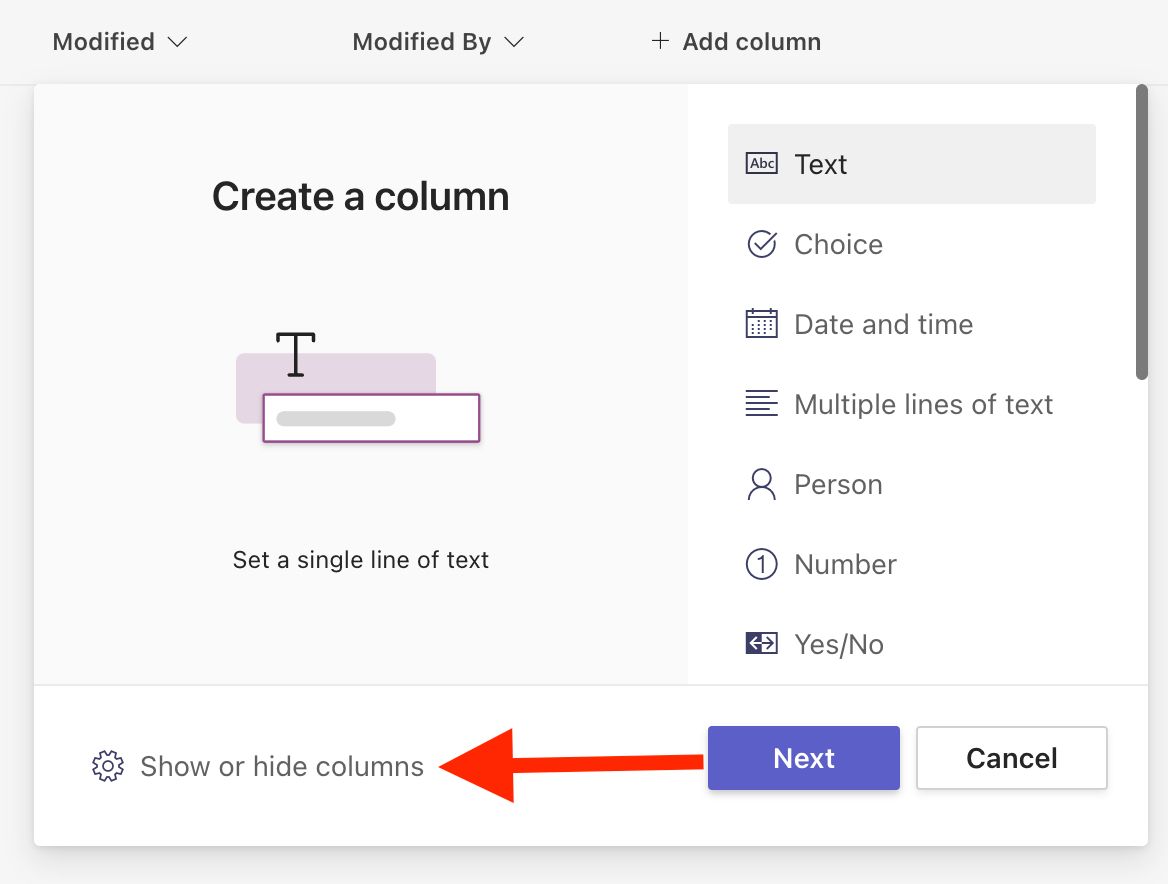
In addition to creating a new column for a new type of metadata, users can also elect to expose any of the existing metadata options. Just click on the Show or hide columns link in the bottom left of the Create column dialog to see what’s currently displayed and select other columns to display.
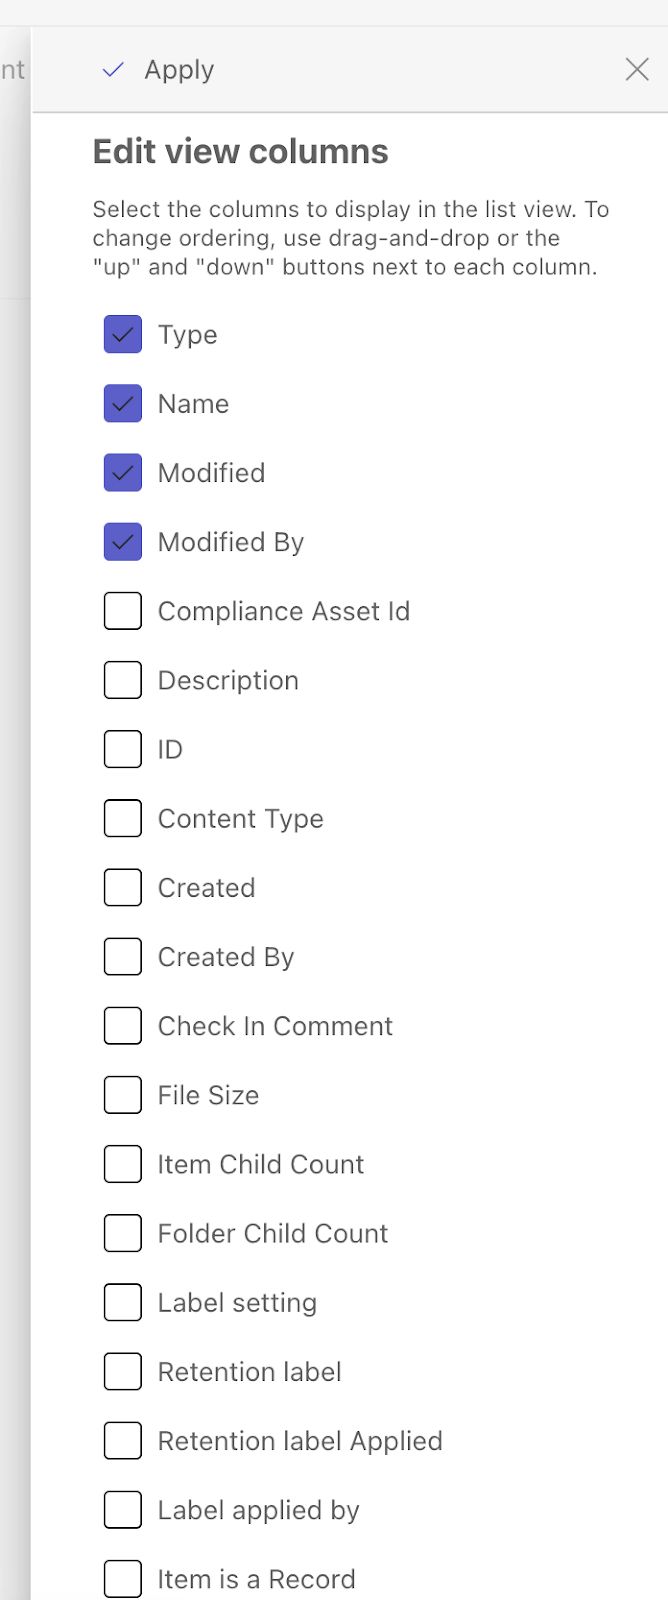
Now users will see the lengthy list of existing metadata properties, and select more columns to display.
Creating metadata properties
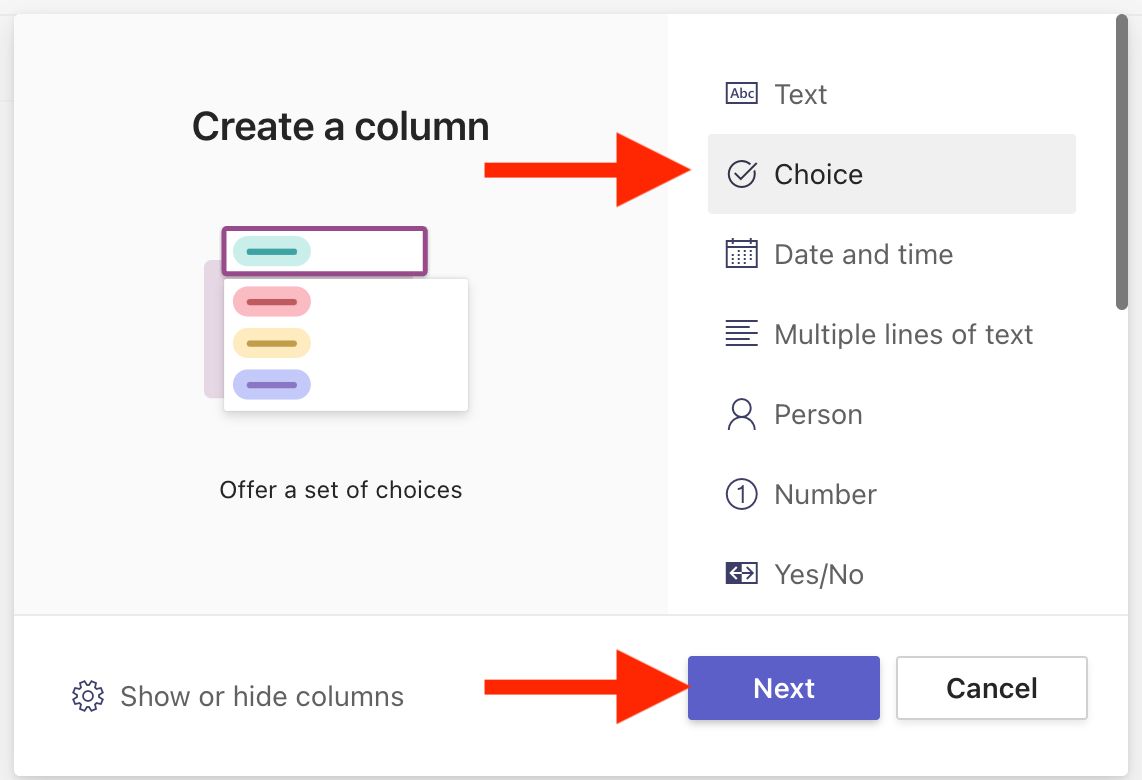
The default properties in Microsoft Teams only scratch the surface of what’s possible. Most organizations will need to create their own properties, which can then be edited at the file level. To create a new property, select the Add column option from the Files tab. In the dialog, select which type of property to add and then click Next.
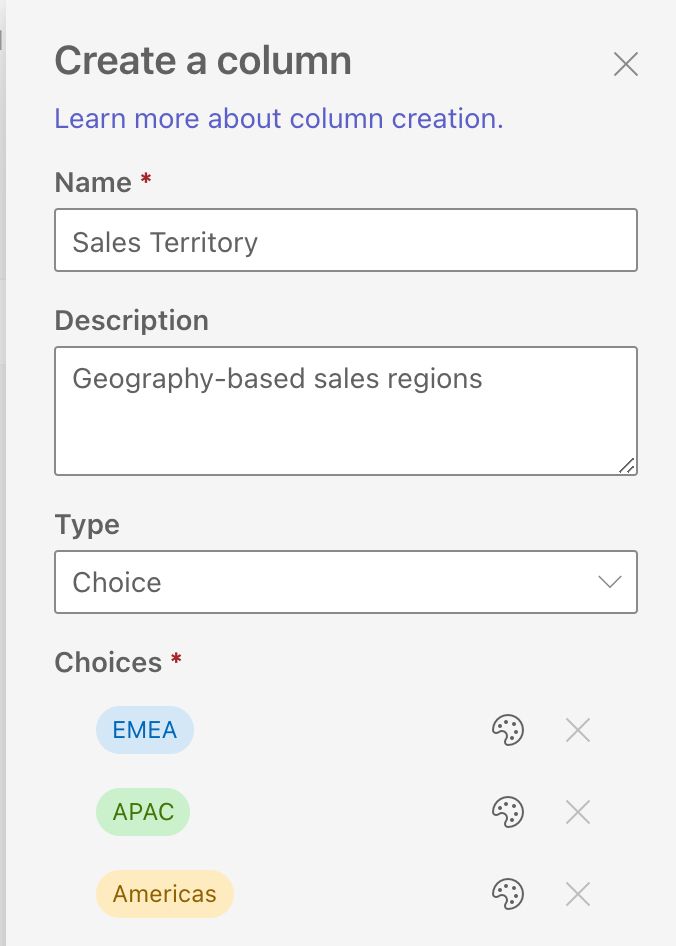
Then the property’s specifics can be set up, such as creating a drop-down list of sales territories.
Using these custom properties, organizations can label and categorize files based on the dimensions that make the most sense to their business, workflows, and requirements. This could include metadata related to particular clients, records and information management, regulatory compliance, or internal projects.
Editing metadata properties
Now that users can add and expose metadata properties, some files may need their metadata updated or augmented if that information isn’t already present. For the file in question, click the three dots to the right of the file name to open the menu, and then select Details all the way at the bottom.
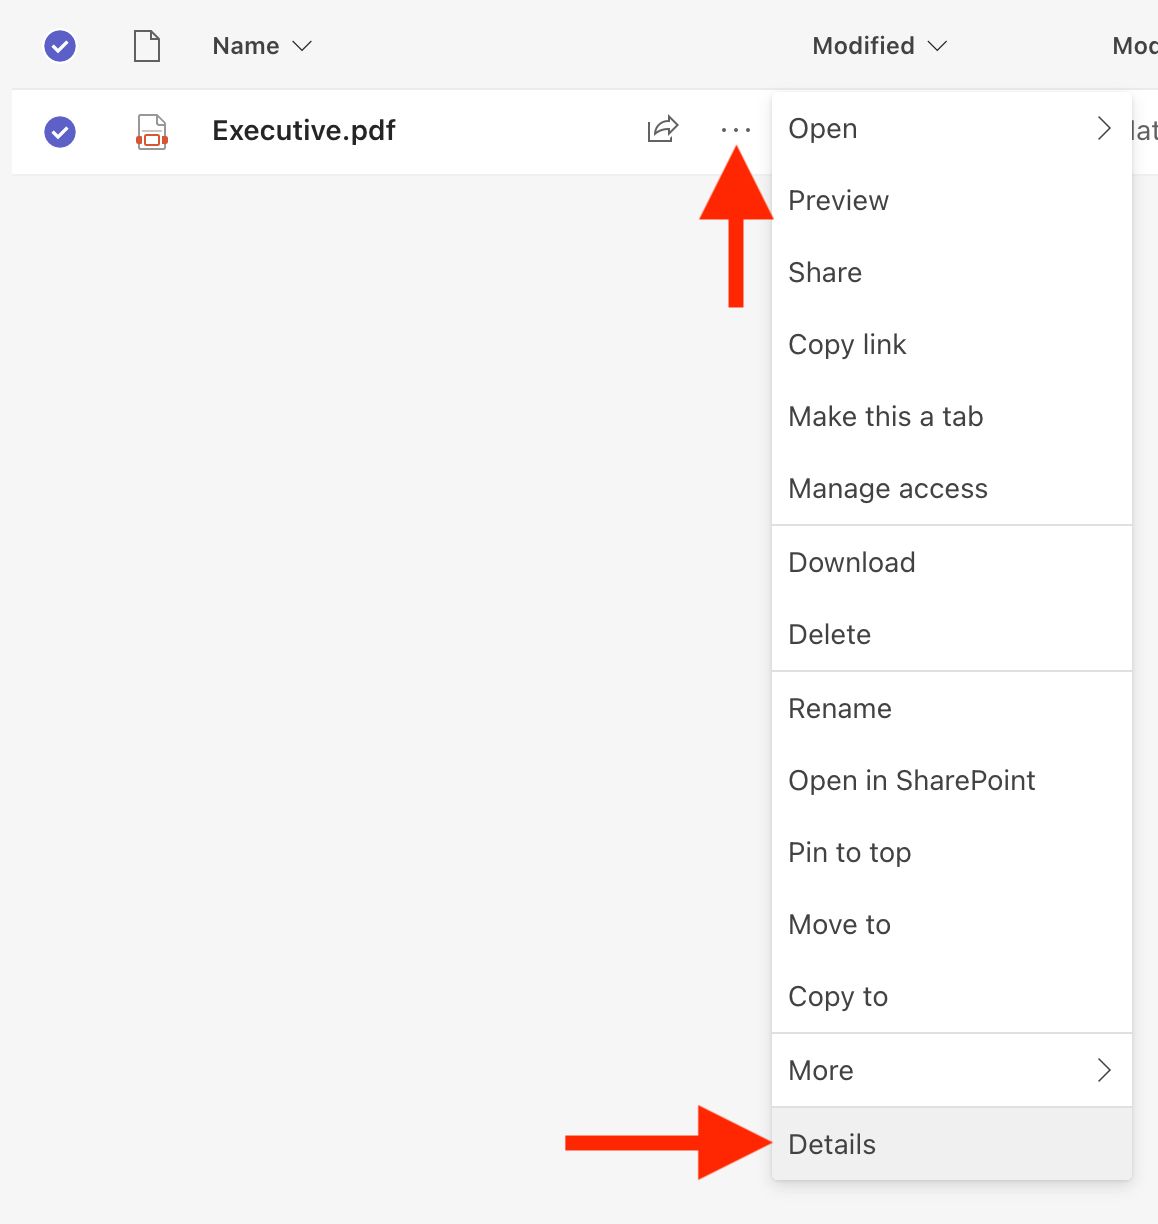
This will open up a window where any editable property can be set or updated.

Putting metadata to use
Now that Microsoft Teams has made it much easier to add and edit metadata to shared files, users can tame the tangled mess of files within Microsoft Teams. They can expose the columns containing relevant metadata, then search, sort, and filter using those options to narrow things down to the files they’re looking for.
Metadata also creates consistency. File naming conventions can only add so much detail, but with a limitless amount of tags and labels, every file related to a particular customer or project or office location, for example, can all be identified instantly.
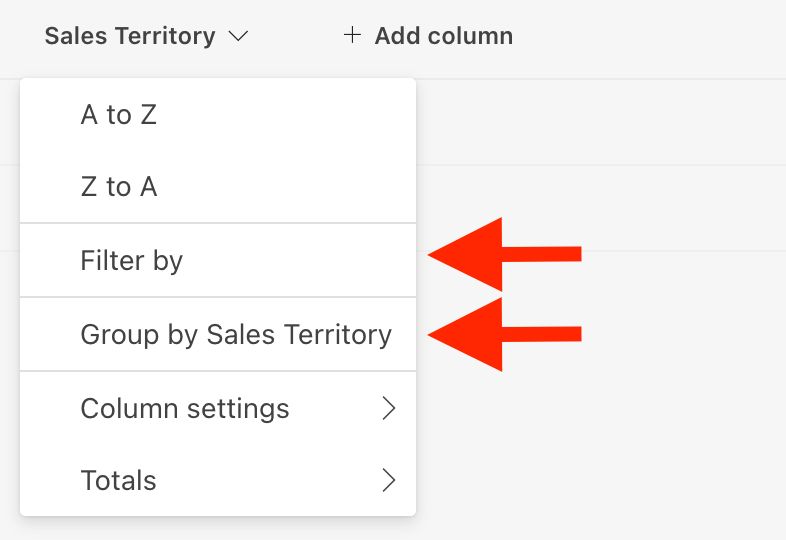
For frequently needed groupings of files based on this metadata, users can also create custom views. For example, selecting the newly created Sales Territory column gives users the option to filter specific sales territories or to group files by sales territory.
To save that new view, just go to All Documents in the upper-right of Teams and select the Save view as option.
Users can save that as a private view or make it public for the rest of the members of the channel to use as well.
For more details on how to organize files in Microsoft Teams, we invite you to watch the recording of our free webinar on this topic. And stay tuned for our next post, where we’ll explore how harmon.ie makes everything even easier while unlocking even more capabilities.