Upload Office Documents to M365 with harmon.ie App for Office
- Launch the harmon.ie App add-in.
- Select the upload location.
- Click the Save Here icon (
) that appears next to available upload locations, or open the location and click the Save to <location> button at the bottom.
- Set upload options and properties.
- When the upload process ends, you are notified that you are not working on the online version of the uploaded document. You can select what to do next with the uploaded documents.
Set upload options and properties:
- If a document with the same name already exist in the location, you are prompted to select between:
- Keep Both: uploads the document with new name.
- Add New Version: uploads the document as a new version.
- Cancel: cancels the upload operation.
- harmon.ie opens the Edit Properties view:
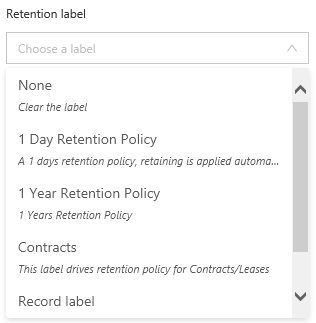
Select a content type and edit the document’s properties. Required properties are marked with a red asterisk (‘*’). - If the SharePoint location contains Retention Labels, select a Retention Label from the Retention Label drop-down list. Select None to remove a Retention Label.
- Click Save.
- If prompted, check in your documents, to make them available to other users.
What to do when the upload process ends:
- Open in Word/Excel/PowerPoint: opens the SharePoint version in the local Office application.
- Open in Word/Excel/PowerPoint Online: opens the SharePoint version in Office Online.
- Save to another location (
): saves the document to another SharePoint location.
- Copy document link (
): copies the link to the SharePoint document to the clipboard.
To check in a SharePoint document:
If the location to which you uploaded documents requires check in, you are prompted to do so.
- If both major and minor versions are being tracked in the document library, select between Minor version (draft) and Major version (publish).
- Optionally, check Retain Check Out.
- Optionally, supply a check in Comment.
- Click Check-in.

